Tuesday, March 22, 2011

Side Step Card - SU Kit

Supplies:

Stampin Up Paper Colors:Very Vanilla
Daffodil Delight
Old Olive

Brights Patterns Designer Series Paper Pack

Stampin Up Ink:
Daffodil Delight
Basic Gray
Rich Razzelberry

Stampin Up Stamps:
Bring on The Cake
Aviary
Stampin Up Punches:
Build a Blossom Punch
1" Circle punch
1 3/4" Circle Punch
Word Window Punch


Others:
Brad
Hemp twine

I love side step cards, there a lot of fun to make. Here is a link to a great tutorial, http://www.juliedavison.com/Tutorials/0909_SideStepCard.pdf

Sunday, March 20, 2011

Cupcake Card With Gift Card Holder - SU Kit

Have you seen the spring Stampin Up mini? If you haven't you need to check it out, its my favorite mini yet. The Cupcake on this card was made using the Create a Cupcake stamp set and Cupcake Punch. 

Outside:

Inside:
Supplies:
Stampin Up Paper Colors:
Crumb Cake
Very Vanilla
Regal Rose
Brights Patterns Designer Series Paper Pack

Stampin Up Ink:
Daffodil Delight
Real Red
Melon Mambo (cupcake sprinkles)
Basic Black
Crumb Cake
Early Espresso

Stampin Up Stamps:
Create a Cupcake

Stampin Up Punches:
Dotted Scallop Ribbon Punch
Build a Cup Cake Punch
Word Window Punch


How to make Gift Card Holder:

Start with a 5 1/2 X 11 piece of paper

Step 1 - Score at 4 1/4", 5 1/2" and then flip and score at 4 1/4"


Step 2 - Fold so it makes an M shape
 Step 3 - Put adhesive on the inside of the M to glue the folds together.

Step 4 - Mark 1" from each end and then using your window punch, punch slit for gift card. Only put punch half way down.

 And then their you have a gift card holder:


Saturday, March 19, 2011

Yeah I finished Changing over my Stamps!

Hi Everyone. So I finally finished changing all my wood block stamps over to clings. I can't believe how much space savings this has made for me! 

Before:

After:

Wednesday, March 2, 2011

How to make your own cling stamps.


I'm really excited about this one. I'm running out of room for my wood block stamps, but don't like unmounted rubber stamps with Aleene's tack it over and over, so I thought wouldn't it be great if I could make my own clings! So I started searching the net and found Cling Vinyl at Create For Less. I've started changing them over and its been fantastic, so I had to make a video to share with you all. I hope everyone enjoys it.

(Sorry its a little shaky to start, I was holding it so I could show you my storage, I do put it on the stand 1/2 way in, hope I don't make anyone sick)


Since I made the video, I did have a few stamps that the adhesive wasn't as sticky so I just coated it with a thin coat of my zig pen and that worked fine.

Also I was carious if anyone else has done this since I haven't heard of anyone else doing this and I did find 2 other videos, one person is using this stuff that also comes with the foam and is about $5 a sheet (that's a little bit much for my budget) and the other women scans her stamps and then prints them, not a bad idea but I think its quicker to just stamp with the staz-on. The nice part of the Grafix Cling Vinyl Sheets is both sides cling where from what I read about some of the others is only one side clings

Tuesday, March 1, 2011

DIY Gifts for my Not So Secret Sister

I made these a little while ago but wanted to wait to post them until she got.

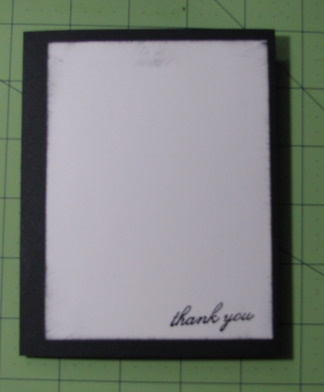
Black & White Thank You Cards

I was in need of some simple thank you cards so I made a few of each of these. If you haven't noticed by now I LOVE black and white so it should be no surprise that I absolutely love these cards, and the little flower on the 2nd card, so much fun to make. I have another project that I made one of those flowers for that I'm absolutely loving but I have to wait to post until the person its going to gets it as they may check my blog...

Supplies:
Basic Black
Whisper White
Basic Black Taffeta Ribbon
Very Thankful
Black ink and Black embossing powder
heat tool
Spots and Dots Cuttlebug embossing folder


Supplies:
Basic Black
Very Vanilla
First Edition Patterned paper

Basic Black Ink
Simply Thanks Stamp
Nestabilities -Labels Three
(For Flower)
First Edition Patterned paper

1 3/8" circle punch
1" circle punch
basic black glitter brad
basic black ink

Thursday, February 17, 2011

Blog Candy

One of my wonderful cricut sisters is celebrating her 1st blogiversary by giving away some blog candy! So make sure you take few minutes to check out her blog, she's very creative!  http://craftyteacher-stephanie.blogspot.com/

Wednesday, February 16, 2011

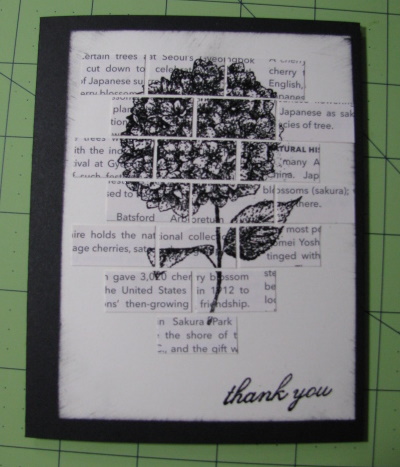
Tile card tutorial - Jan Stampin Up Kit 2

I saw this idea a while back and absolutely loved it and when the Stampin Up's Spring mini came out with the First Edition Paper I knew I would have to be doing this as one of my card kits. I put together a step by step tutorial to make the instruction simple to follow.


Supplies:
Basic Black 8.5 X11 Card Stock
Very Vanilla Card Stock
First Edition Patterned paper
Basic Black Ink
Black Embossing Powder
Heat tool
Because I care Host Set Level 1
Black Lace

Step 1. Start with a piece of Basic Black card stock folded to 5.5" X 4.25"
2. Cut a piece of Very Vanilla to 5" X 3.75" and ink the edges with basic black ink. At the bottom I stamped the thank you from Because I Care (Host set) and embossed it with black embossing powder. Then mounted the Very vanilla a little off centered on to the basic black.
3. Next I stamped the flower from Because I Care on to a 3.5" X 3.25"  piece of first edition paper and then again embossed it in black.
4. Next I cut the Img into 1/2" strips.

5. Now comes the tricky part when you cut the 1st strip you are going to cut a 1/2", 1.5", 2.5" for the next strip your going to cut it at 1", 2", and 3".  For strip 3, 5 and 7 you will cut like the 1st strip and for  strips 4 & 6  you want to cut them like the 2nd strip. This will give you that "brick" look.

6. Next you want to attach your "bricks" to your card I like to lay them out before gluing them down to play with positioning and which ones to keep and which ones to leave off.
7. Add a piece of lace around the card and tie a bow, and your card is complete!

Sunday, February 13, 2011

Jan Stampin Up Kit 1

January's Stampin Up Kit


Supplies:
Take a Spin Stamp set
So Happy For You (Sale a Bration 2011)
Game Spinner Hands
Brights markers
Whisper White Srampin Up Paper
Tempting Turquoise Stampin Up Paper
Old Olive Stampin Up Paper
Tangerine Tango

A card sketch challenge


This weekend I challenged the girls in my stampin up club to complete one of three sketches for a chance to win an adhesive goody bag . Here's one of the sketches and this is what I made with it...

Supplies:
So Happy For You (Sale a Bration 2011)
Sweet Summer (Sale a Bration 2011)
Old Olive Stampin Up Paper
Early Espresso Stampin Up Paper
Early Espresso Ink